FSLogix per-host pool customization
You can configure FSLogix with Nerdio Manager and apply its settings to each host pool in the AVD deployment.
For more information refer to Overview of host pools.
Adding a server includes installing FSLogix and applying the necessary settings that were selected for the host pool. You can use the global default settings or customize the settings for each host pool.
To configure customized FSLogix settings for a host pool:
Note: Any settings configured here are applied only to newly created or re-imaged hosts in this pool.
-
Navigate to the list of host pools and locate the host pool you wish to change.
-
Select the more options
 menu, and then select Settings .
 -
From the menu options on the left-hand side, select FSLogix.
-
Enter the following information:
-
Enable FSLogix profiles: Select the toggle to enable FSlogix profiles.
Note: If this option is not enabled, Nerdio Manager does not install the FSLogix profile container application on newly created VMs when they are deployed in this host pool. Existing VMs are not affected.
-
From the drop-down list, select an existing profile name. Alternatively, select Custom to create a custom profile for this host pool.
Note: If you select an existing profile then this will automatically complete the configuration with the detail in the selected profile, which cannot be edited. If you select Custom you can configure the profile as required.
- Version From the drop-down list, select the FSLogix version.
-
Configure session hosts registry for Entra ID joined storage:
-
Exclude the local admin accounts from FSLogix:
-
Exclude domain accounts from FSLogix:
-
FSLogix profiles path (VHDLocation).
-
Configure Office Container to redirect Microsoft Office user data (ODFC):
-
FSLogix Office Container path (VHDLocation):
-
-
Use Cloud Cache: Select this option to enable FSLogix Cloud Cache.
Tip: For performance reasons, it is strongly recommended that you use Premium SSD and Ephemeral OS disks when Cloud Cache is enabled. (Standard SSD disks might be sufficient in very small environments or a testing scenarios.)
Note: See the following Microsoft article for more information about FSLogix Cloud Cache.
Cloud Cache allows you to specify multiple profile storage location. It asynchronously replicates the profiles and makes the profiles available in multiple storage locations at the same time. So, if one of the locations is not available, the session host automatically fails over to one of the alternate locations.
-
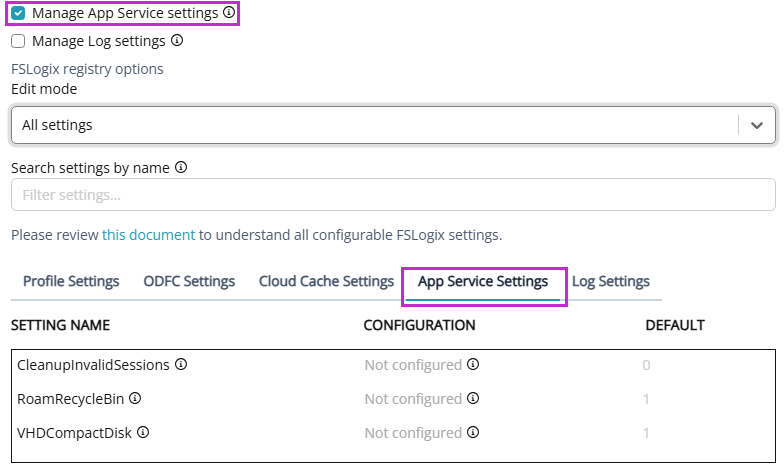
Manage App Service settings: Select this option to edit the FSLogix app service registry settings.
-
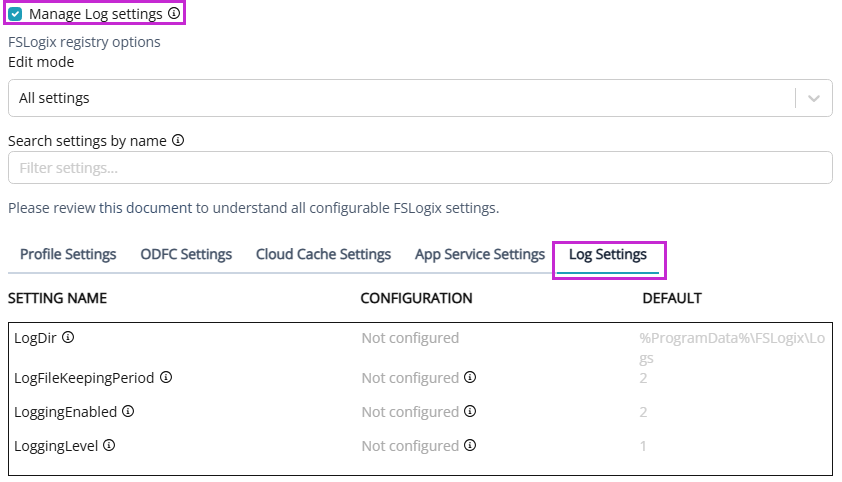
Manage Log settings: Select this option to manage log registry settings.
-
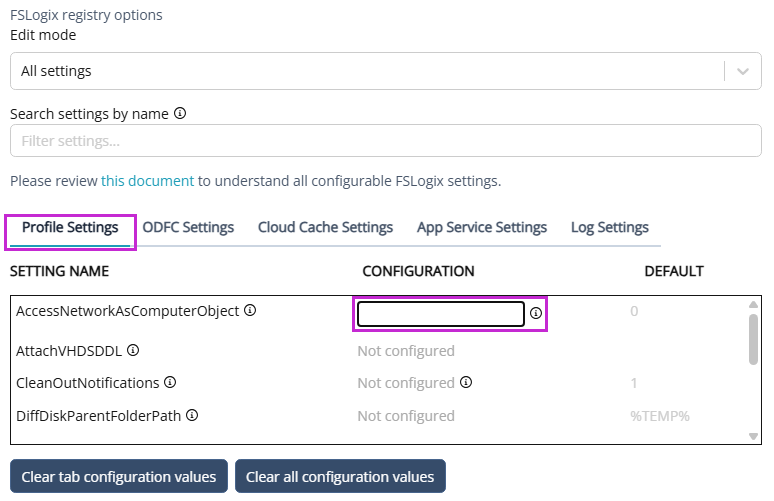
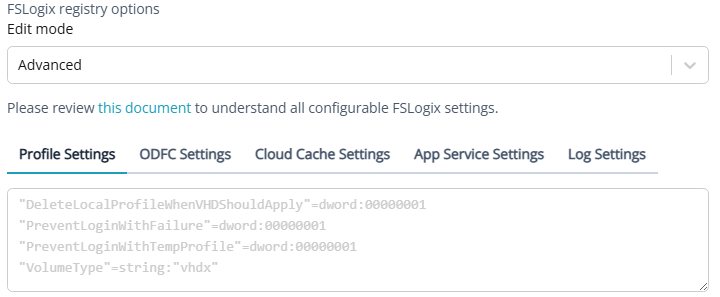
FSLogix registry options: From the Edit mode drop-down list, select whether you want to work with All settings or Advanced.
-
For All settings:
-
From the tabs, select the component you want to configure. Select from Profile Settings, ODFC Settings, Cloud Cache Settings, App Service Settings, or Log Settings.
-
In the Configuration column, type the setting's value. For example, to configure profile settings, select the Profile Settings tab, select the box in the Configuration column, and enter the setting.
-
Select Clear tab configuration values to set all values for that particular component as Not configured.
-
Select Clear all configuration values to set all the settings to Not configured.
-
Optionally, in the Search settings by name box, you can filter the settings by entering the name or part of the name of the setting.
-
-
-
For Advanced:
-
You can add DWORD values in the format: "ValueName":dword:ValueData (example: "ProfileType"=dword:00000003).
-
You can add string values in the format: "ValueName":"ValueData" (example: "VolumeType":"vhdx").
-
-
-
Redirections: If you want to include redirections in the global profile for re-use across customers select the toggle to enable this feature.
Note: For more details, see Types of containers.
-
Force the installation of FSLogix apps even if already installed: Select this option to force the reinstallation of the FSLogix agent and applications.
-
Apply to existing hosts: Select this option to apply these changes to existing hosts. Otherwise, the change only effect new or re-imaged hosts.
-
Process Hosts in Groups Of: Type the number of concurrent actions to execute during this bulk operation.
-
Number Of Failures Before Aborting: Type the number of failures that causes the process to stop.
-
Messaging: To send messages to active users, select the toggle to enable this feature and enter the following details:
-
Delay: From the drop-down list, select the number of minutes to wait after sending the message before starting the process.
-
Message: Type the message you want to send to the users.

-
-
Schedule:To apply the changes at a selected time, select the toggle enable this feature and enter the following details:
- Name: Enter a name for the schedule.
- Description: Enter a description for the schedule.
- Start Date: Select the Start Date box and from the calendar, select the desired start date..
-
Time Zone: From the drop-down list, select the time zone for the Start time.
-
Start Time: From the drop-down lists for hours and minutes, select the time to start.
-
Repeat: From the drop-down list, select the recurring schedule, if desired.
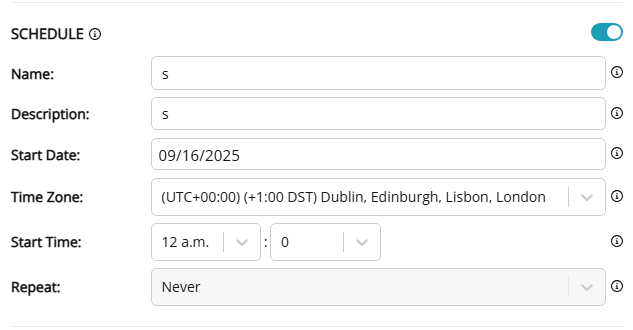
Note: The drop-down has the option After Patch Tuesday. This allows you to create a recurring schedule based on Patch Tuesday.
-
Days After: If you selected After Patch Tuesday, type the number of days after Patch Tuesday to run the scheduled task.
-
-
-
-
Once you have entered all the desired information, select Save or Save & close.
Host Pool Disaster Recovery: You can enable host pool level active/active DR configuration and Nerdio Manager automatically distributes session hosts across two Azure regions. Users are distributed across VMs in both regions as they sign in and FSLogix profiles are automatically replicated using Cloud Cache. In case of an Azure region failure users continue to access VMs in the available region. Fore more details, view this demo.