Update the Nerdio Manager application
Nerdio releases regular updates for Nerdio Manager, but Nerdio Manager does not automatically update itself. Instead, it gives version control to the administrators. There are several methods that can be used to update Nerdio Manager to the latest version. Due to possible restrictions in some environments, alternative methods may be required.
Nerdio Manager updates FAQs
Will updating Nerdio Manager interrupt currently active sessions or kick off users?
No. The update process only affects the Nerdio Manager App Service. User sessions are handled by the AVD service, which is managed and hosted separately by Microsoft. The only interruptions that occur affect the Nerdio management console. In addition, the auto-scale automation is unable to perform actions during the update process. Auto-scale automation safely continues automatically after the update process is completed.
How long does the update process take?
Using the Automation Account, the process generally takes ~3-7 minutes, as all actions are performed in Azure. When done manually, using the standalone installer through PowerShell, this time is affected by local variables such as the internet connection and client machine's hardware. The data files are roughly 120-160MB in size.
It may take several minutes for Nerdio Manager to complete processing background updates and the portal to be available again after the update has been successfully applied.
Can I skip over versions when updating?
Yes. All updates are cumulative, and it is recommended that you skip intermediate versions and go directly to the latest Generally Available release. For example, you can update directly from 2.2.0 to 2.10.1.
Can I rollback to a previous version?
Starting with version 6.3, you can rollback to a previous version, but you can only rollback to 6.2 or later. For example, 6.4 can be rolled back to 6.3 or 6.2, but not earlier. See Restore Nerdio Manager to a previous versionfor details.
How can I check the currently deployed version?
From Nerdio Manager, select Updates. The Nerdio Managersoftware update page is displayed, detailing the deployed version, along with the release date, install ID, services manage, the version of FSLogix, and the AVD agent.
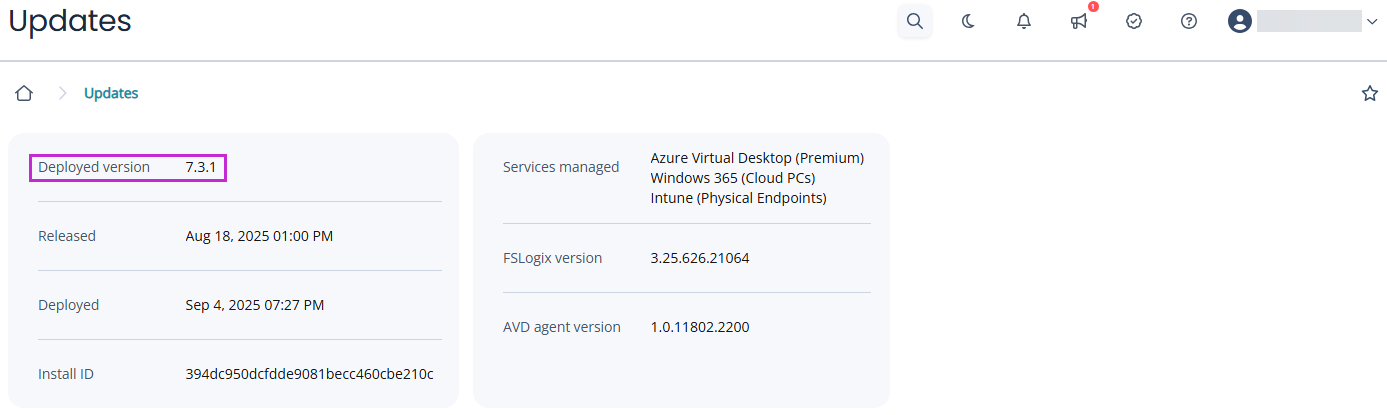
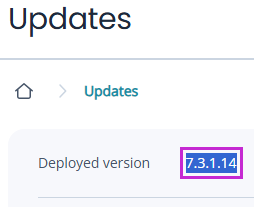
To display the exact deployed version, double click the version number.
Method 1: Deploy button
The simplest method for updating Nerdio Manager is to use the Deploy button.
Note: This process must be completed by a user with Contributor or Automation Operator rights to the Azure Automation account deployed by Nerdio Manager.
To update using the deploy button:
-
Navigate to Updates.
-
Locate the latest version and select the deploy
 icon.
icon. -
Monitor the Azure automation job, under the Output tab, and watch until the Status is reported as Completed.
Method 2: Use Azure Cloud Shell (v2.10+)
You can use the Azure Cloud Shell to update Nerdio Manager.
Note: This process must be completed by a user with the Contributor rights to the Nerdio Manager App Service.
To update using Azure Cloud Shell:
-
Navigate to Updates.
-
Locate the latest version and from the more options
 menu, select Azure Cloud Shell.
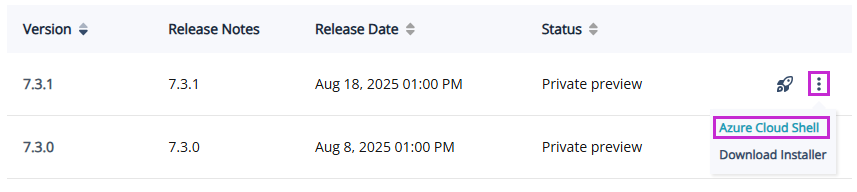
-
Select Copy to copy the script to the clipboard, and then select Launch Azure Cloud Shell.
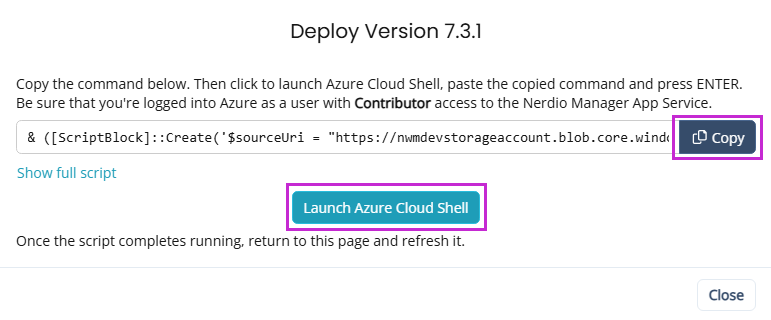
Note: To view the script, select Show full script.
-
In Azure Cloud Shell, paste the script and press Enter.
-
When the script run is completed, refresh the Updates page.
Method 3: Standalone PowerShell update
You can use PowerShell to update Nerdio Manager.
Note: This process must be completed by a user with the Contributor rights to Nerdio Manager’s deployment resource group.
To update using PowerShell:
-
Navigate to Updates.
-
Locate the latest version and from the more options
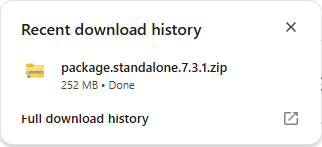
 menu, select Download installer.
Note: The installer is downloaded as a .zip file to your browser's default download folder. Copy the file to a temporary folder on your C: drive.
-
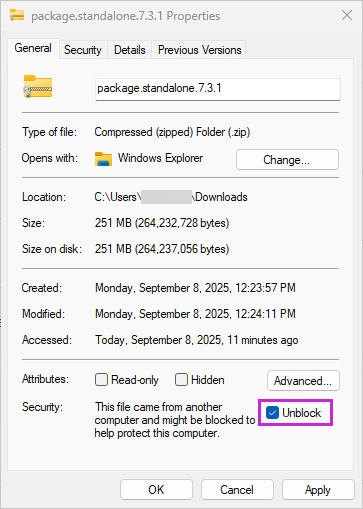
Navigate to the folder where the downloaded .zip has been saved, right-click the file, and select Properties.
-
At the bottom of the General tab, select Unblock, select Apply, and then select OK.
-
Extract the .zip file to the temporary folder.
-
Open PowerShell.
-
Change the directory to the folder with the extracted installer.
-
Run
DeployUpdate.ps1and follow the instructions.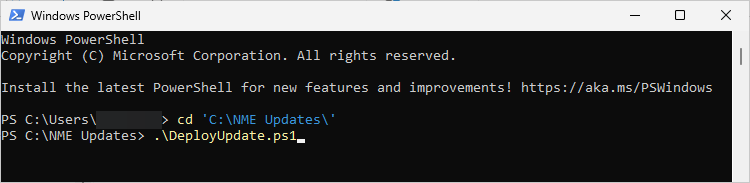
-
When the installation is completed, refresh the Updates page.
Method 4: Manual .zip push" deployment
You can use the .zip push method in the Azure portal to update Nerdio Manager.
Prior to redeploying the new package, you need to clear the existing application from the App Service. You can do this using the Kudu service portal or the Advanced Tools Console.
Note: This process must be completed by a user with the Contributor rights to the Nerdio Manager App Service.
To update Nerdio Manager using the .zip push method:
-
Navigate to Updates.
-
Locate the latest version, and from the more options
menu, select Download installer.Note:The installer is downloaded as a .zip file to your browser's default download folder. Copy the file to a temporary folder on your C: drive.
-
Expand the package file and retrieve the file named site.zip or app.zip. Only one file is included.
Warning: Do not unzip or expand the site.zip or app.zip file.
-
In the Azure portal, navigate to App Services > Nerdio Manager App Service.
Note: The Nerdio Manager App Service name is typically prefixed with nmw-app. Make sure you don't confuse it with the App Service named nmw-ccl-app, which is used for Cost Attribution.
-
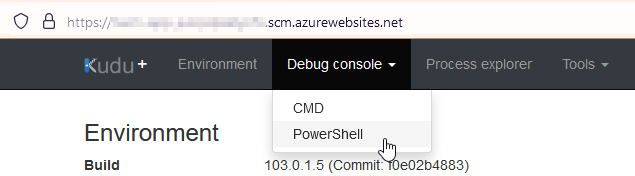
In the left menu, navigate to Development Tools > Advanced Tools, and then select Go to launch the Kudu console.
-
Clear the existing application from the App Service:
-
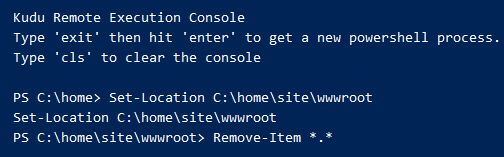
In the top toolbar, select Debug Console > PowerShell.
-
Change location to the site\wwwroot directory. Use one of the following paths:
-
cd C:\home\site\wwwroot
-
Set-Location C:\home\site\wwwroot
-
-
Run one of the following commands to clear all files from the directory:
-
del *.*
-
Remove-Item *.*
Note: The folders can remain in the directory.
-
-
-
Redeploy the app package:
-
In the Kudu console toolbar, go to Tools > Zip Push Deploy.

-
In the file explorer dialog box, drag the site.zip or app.zip file that you retrieved from the package file you previously downloaded.
Warning:
-
Make sure you drag only the site.zip or app.zip file, rather than the package.standalone*.zip, which prevents Nerdio Manager from running successfully.
-
Ensure the file's extension is .zip.
The lower section of the page updates to reflect the package uploading and deploying. Wait until the final task displays Deployment successful.
-
-
-
Run the provision WebJob:
-
In the Azure portal, navigate to App Service > Settings > WebJobs.
-
Select the provision job and make sure that its status is Running. If it's Stopped, in the Run column, select the play button, and then select Start.
Note: If the WebJob named provision is missing, the wrong zip file was uploaded to Nerdio Manager's App Service. Verify and re-upload the site.zip file only (do not upload the full package.standalone*.zip file).
-
-
Return to the Nerdio Manager app and refresh your browser to confirm the app is online and accessible.
Method 5: Manual Azure Cloud Shell deployment
You can use Azure Cloud Shell to update Nerdio Manager.
Note: This process must be completed by a user with the Contributor rights to Nerdio Manager App Service.
To update Nerdio Manager using Azure Cloud Shell:
-
Open Azure Cloud Shell.
-
Customize and run the script below.
-
When the script finishes running, return to the Nerdio Manager app and refresh the browser page to confirm the app is online and accessible.
$sourceUri = "Obtain URL from Nerdio support (nme.support@getnerdio.com)"
$subscriptionId = "Your Subscription ID containing the NMW app service"
$resourceGroupName = "Resource Group name that contains NMW app service"
$webAppName = "WebApp Name (e.g. nmw-app-xxxxxxxxxxxx, not including azurewebsites.net)"
$version = "App version to update to (e.g. 6.4.1)"
$webjobName = "Provision"
Set-PSDebug -Strict
$ErrorActionPreference = "stop"
Write-Output "Downloading package"
$folderName = (New-Guid).ToString()
$packageZipPath = Join-Path -Path $Home -ChildPath ($folderName + ".zip")
$packageDestPath = Join-Path -Path $Home -ChildPath ($folderName)
$packageDestVersionPath = Join-Path -Path $packageDestPath -ChildPath "version.txt"
$packageDestAppPath = Join-Path -Path $packageDestPath -ChildPath "app.zip"
Write-Output "Destination: $packageZipPath"
Invoke-WebRequest -Uri $sourceUri -OutFile $packageZipPath
Expand-Archive -Path $packageZipPath -DestinationPath $packageDestPath
az account set -s $subscriptionId
az configure --defaults group=$resourceGroupName web=$webAppName
Write-Output "Stop web job"
az webapp webjob continuous stop --webjob-name $webjobName
Start-Sleep -Seconds 10
Write-Output "Stop web app"
az webapp stop
Start-Sleep -Seconds 10
Write-Output "Deploy package"
az webapp deploy --src-path $packageDestAppPath --clean
Start-Sleep -Seconds 10
Write-Output "Start web app"
az webapp start
Start-Sleep -Seconds 10
Write-Output "Start web job"
az webapp webjob continuous start --webjob-name $webjobName
Start-Sleep -Seconds 10
Write-Output "Remove temp files"
Remove-Item -Path $packageZipPath
Remove-Item -Path $packageDestPath -Recurse
Write-Output "Version $version completed successfully. Return to https://$webAppName.azurewebsites.net and refresh the browser page."
Restore Nerdio Manager to a previous version
Starting with version 6.3, you can restore a previous version, but you can only downgrade to 6.2 or later. For example, 6.4 can be downgraded to 6.3 or 6.2, but not earlier.
To restore to a previous version:
-
Navigate to Updates.
-
Locate the version you want to downgrade to and select the re-deploy
 icon.
icon. -
Under the Output tab, monitor the Azure automation job and watch until the Status is reported as Completed.
Note: When restoring from version 6.7 to an earlier version, there is a known issue where all dashboard values are reported as 0 (zero) if the option to include all costs is configured. To prevent this issue, from the user cost attribution dashboard (Dashboard > User cost attribution), delete any configurations with the include all costs option selected before you start the redeployment.