Harden Azure Storage Account
Storage Accounts are used by both AVD and Nerdio Manager to store various sorts of data. Most notably, storage accounts are used for holding end user's FSLogix Profiles, boot diagnostics, custom scripted actions, and MSIX app attach packages. This topic covers key steps and important considerations when implementing tighter security for common scenarios using storage accounts.
Requirements
-
The App Service Plan (essentially the "performance tier" for the server that is hosting the App) needs to be upgraded from the default of Basic (B3), to Standard or Premium. This means increased operating costs. See Upgrade the Azure App Service for details.
-
A virtual network (VNet) that can be used to connect the App Service and the Storage Account. This virtual network also needs outbound access for Nerdio Manager to talk to the Nerdio licensing servers via HTTPS (TCP/443). The licensing server URL is https://nwp-web-app.azurewebsites.net/.
Warning: Without VNet integration, Nerdio Manager is unable to connect to a storage account with network restrictions enabled. See this Microsoft article for more information.
Enable VNet Integration for Nerdio Manager's App Service
-
In the Azure portal, locate the Nerdio Manager App Service resource.
Note: It typically has a name in the following format: nmw-app-xxxxxxxxx.
-
Within the menu on the left-hand side of the App Service blade, scroll down to the Settings section.
-
Select Networking.
-
In VNet Integration, select Click here to configure.
-
In VNet Configuration, select Add VNet.
-
Select the VNet you wish to use.
-
Select OK.
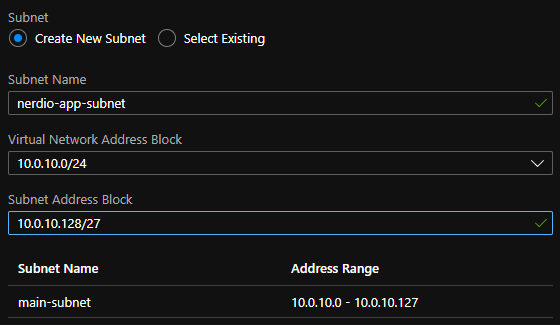
Note: VNet integration requires a subnet delegated specifically for use with app services. This cannot be shared with any other Azure resources. The subnet selected for integration needs to be /28 or larger. It may be necessary to add an additional subnet that is compatible for the integration if there are no unused subnets or subnets not delegated for other services. In this example, there was already a VNet used for session hosts, which still had unallocated IP address ranges within the address block, so a new subnet was created specifically for the app service VNet integration.
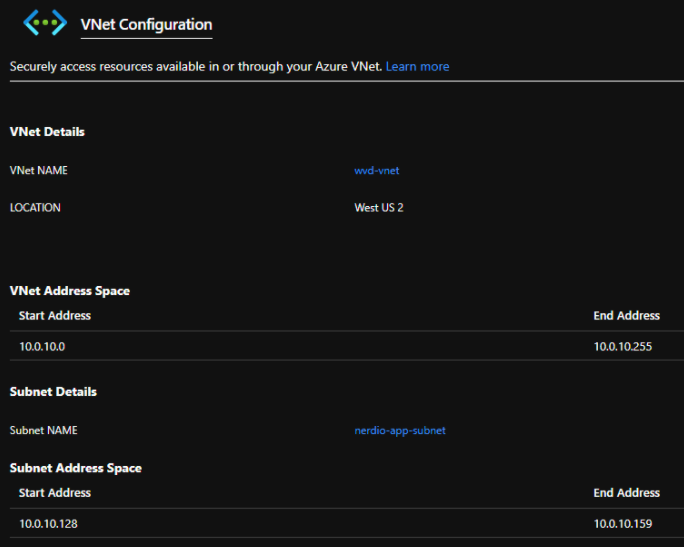
When the VNet is successfully integrated, the page should look something like this:
Harden the Storage Account
Warning: Incorrectly implementing this restriction can cause session hosts to lose access to FSLogix profiles, user data, MSIX apps, software data, etc. Be sure to take these new network restrictions into consideration before proceeding.
-
In the Azure portal, navigate Storage accounts.
-
Locate and select the storage account you wish to harden.
-
Within the menu on the left-hand side of the Storage accounts blade, scroll down to the Security + networking section.
-
Select Networking.
-
In the Firewalls and virtual networks tab, enter the following:
-
Allow access from: Select Selected networks.
-
Select + Add existing virtual network.
-
Virtual networks: From the drop-down list, select the VNet(s) and Subnets you wish to use.
Note: If the storage account contains user profiles, be sure to link all subnet(s) containing AVD session hosts, to ensure FSLogix can mount the user profiles successfully.
-
Select Enable.
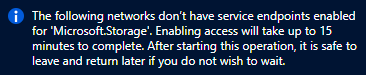
Note: If you receive a message like this, that means it will take time for the changes to fully take effect. This is normal and expected.
-
-
Once you have entered all the desired information, select Save.
-
In Nerdio Manager, refresh the console and check the storage account locations. Alternatively, attempt to perform an action that previously led to an error due to improper storage account restrictions, such as linking an MSIX App Attach storage location or enabling storage auto-scaling.