Resize/re-image a host pool
Warning: Nerdio Manager does not install the BgInfo Azure extension during any automation or management process. However, the BgInfo extension may be installed either through a scripted action directly, or unintentionally, as stated in the Azure PowerShell module issues report.
The system automates the process of updating the session hosts when there are changes that need to be made to applications, operating systems, or other system components. This is accomplished by use of desktop images.
You can use the updated image to:
-
Re-image existing session hosts. (A common use case.)
-
Create new session hosts.
In Nerdio Manager, the desktop image consists of the following Azure objects:
-
A virtual machine that is used to manage the image.
-
The actual image that is used to deploy session hosts.
Note: When you power on a desktop image, you are powering on the virtual machine.
To re-image session hosts with desktop images:
-
Navigate to Desktop Images.
-
Locate the desktop image you want to work with and power it on, if necessary.
-
Connect to the desktop using any remote connection tool (RDP) and make all the desired changes.
-
Once you have completed all the desired changes, return to Desktop Images.
-
Select Power off & set as image.
-
When prompted to confirm your request, select OK.
Note: Once you confirm your request, an extensive automation process begins that commits the changes to an image object.
-
At the bottom of the Desktop Images window, in the Desktop Images Tasks section, you can see the task’s progress. Select Details to see the task’s details.
-
Locate the host pool you want to re-image, and select one of the following:
-
Classic UI: From the Manage Hosts action menu, select Hosts > Resize/Re-image.
-
New UI: From the more options
 menu, select Hosts > Resize/Re-image.
 -
Enter the following information:
-
Select Run now or Schedule.
-
The Schedule tab allows you to perform the task during selected time frame(s). Otherwise, the task starts as soon as you select OK. See Manage Schedules for Tasks for details about creating a schedule. Select the schedule from the drop-down list, or create a new schedule.
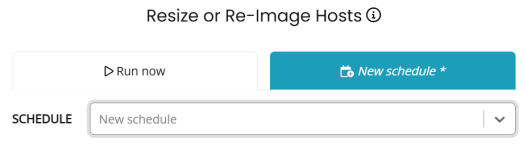
Note: If you opt to create a new schedule, you enter the details at the bottom of the dialog box
-
-
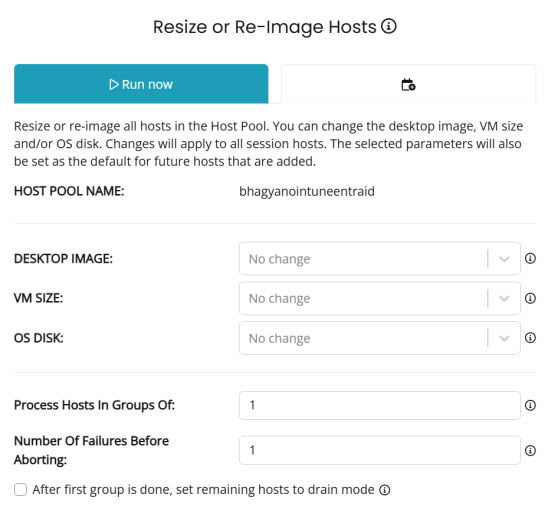
Desktop Image: From the drop-down list, select the desktop image you want to update the hosts with.
-
VM Size: Optionally, from the drop-down list select a new VM size.
-
OS Disk: Optionally, from the drop-down list select a new OS disk.
-
Process Host in Groups Of: Type the number of concurrent operations for the host re-imaging.
Warnings: A larger number of hosts selected allows the re-imaging process to complete quicker, but if there is an issue with the desktop image or Azure, many hosts may end up in an error state and unusable.
You must select this value with care. For example, if you have 150 hosts in the pool, you do not want to want to re-image them one at a time. That would take too long. On the other hand, you do not want to run all 150 operations at the same time. That could overload your environment. So, you may want to run 25 operations per group.
-
Number of failures before aborting: Type the number of failed tasks before the process stops.
Note: This setting can help prevent a problem on the desktop image or Azure from making session hosts unavailable to the users.
-
After first group is done, set remaining hosts to drain mode: Select this option to set all hosts that haven't yet been resized/re-imaged to drain mode as soon as the first group of hosts completes the resize/re-image process.
Note: This ensures that users who connect to their desktop are only directed to a host session VM that has already been resized/re-imaged.
-
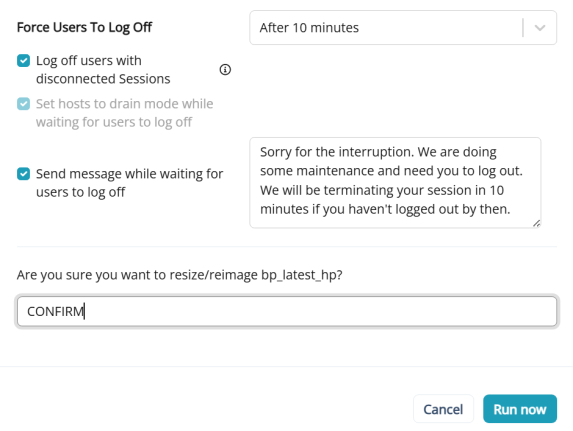
Force Users to Log Off: From the drop-down list, select the time to wait before forcing users to log off.
Note: You may force users to log off either immediately or after a specified time period. Optionally, by selecting Never, Nerdio Manager waits for all users to log off by themselves before re-imaging the host. That is, the re-imaging operation waits indefinitely until all users are logged off. If another scheduled re-imaging operation is due to run while it is waiting for the users to log off, the new scheduled task is skipped.
-
Log off users with disconnected sessions: Select this option to force all sessions, connected or disconnected, to be logged off. When disabled, disconnected sessions on hosts will not be forcefully logged off.
-
Set hosts to drain mode while waiting for users to log off: Select this option to set the hosts to drain mode while waiting for all the users to log off.
Note: By default, this option is selected. You may only deselect it if Force User to Log Off is set to Never.
-
Send message while waiting for users to log off: Select this option and type the text of the message to send.
-
-
In the Are you sure you want to resize/reimage box, enter CONFIRM.
-
-
Once you have entered all the desired information, select Run now (not scheduled) or Save & close (scheduled).